


We are pleased to announce Beta support for MongoDB API in the latest release of YugabyteDB (v2.25.2). This new capability is powered by Microsoft’s DocumentDB extension and made possible by YugabyteDB’s enhanced PostgreSQL compatibility.
YugabyteDB’s inbuilt resilience and distributed capabilities now provide a truly open source solution for MongoDB workloads that need to scale. Click to learn more about the joint collaboration between Microsoft and YugabyteDB.
YugabyteDB has always been a multi-model distributed database providing support for both relational (YSQL – PostgreSQL-based) and Non-SQL (YCQL – Cassandra-based) APIs. The new MongoDB API capability builds on YugabyteDB’s multi-model API commitment by adding support for storing and operating on document-based data. The data is stored natively in the BSON format to efficiently handle binary JSON.
In this blog, we share a step-by-step guide to deploying and running MongoDB workloads on an open source solution created by YugabyteDB, Microsoft (DocumentDB), and FerretDB, that provides a portable, interoperable API for document data stores.
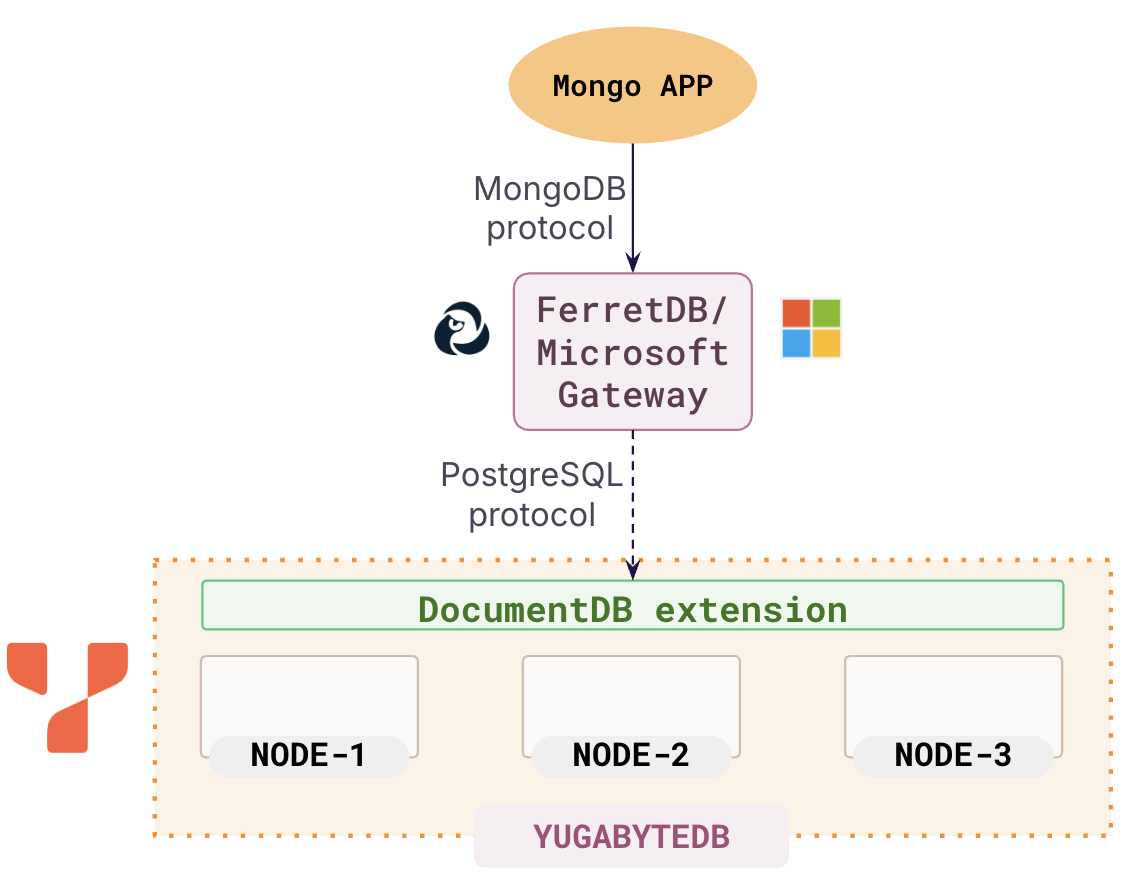
YugabyteDB + DocumentDB + FerretDB
Three core components combine to allow MongoDB apps to seamlessly work on YugabyteDB:
- DocumentDB: A PostgreSQL extension that adds native support for the BSON data type and MongoDB API in PostgreSQL.
- YugabyteDB: A PostgreSQL fork that natively supports the DocumentDB extension and provides it with distributed capabilities.
- FerretDB: A stateless gateway that converts the MongoDB Protocol used by MongoDB apps into a PostgreSQL protocol that YugabyteDB and DocumentDB operate with.
Considerations
As an open source project, we have decided to release the new API while it is still under active development to facilitate community collaboration and contribution. This means there are some limitations/considerations in the current release:
- This is for Beta use only (so expect to find bugs).
- Currently no support for arm64.
- Currently no support for secondary indexes.
These limitations and additional enhancements are in active development, and will be addressed in future releases.
How to Deploy and Run MongoDB on YugabyteDB
The following is a step-by-step guide to deploy and run MongoDB workloads on YugabyteDB:
1. Start a YugabyteDB Cluster
For the purpose of this blog, we are going to run a simulated, 3 node local cluster. Refer to Deploy YugabyteDB for additional deployment options.
First, download v2.25.2 from https://docs.yugabyte.com/preview/releases/ybdb-releases/v2.25/#v2.25.2.0
The gFlags ysql_enable_documentdb and enable_pg_cron need to be enabled for you to use the DocumentDB extension. Since the feature is in Beta, you need to add ysql_enable_documentdb to allowed_preview_flags_csv.
# Start node 1
./bin/yugabyted start --advertise_address=127.0.0.1 \
--base_dir=$HOME/yugabyte-data/node1 \
--cloud_location=aws.us-east-1.us-east-1a \
--master_flags="allowed_preview_flags_csv=ysql_enable_documentdb,ysql_enable_documentdb=true,enable_pg_cron=true" \
--tserver_flags="allowed_preview_flags_csv=ysql_enable_documentdb,ysql_enable_documentdb=true,enable_pg_cron=true"
# Start node 2
./bin/yugabyted start --advertise_address=127.0.0.2 \
--join=127.0.0.1 \
--base_dir=$HOME/yugabyte-data/node2 \
--cloud_location=aws.us-east-1.us-east-1b \
--master_flags="allowed_preview_flags_csv=ysql_enable_documentdb,ysql_enable_documentdb=true,enable_pg_cron=true" \
--tserver_flags="allowed_preview_flags_csv=ysql_enable_documentdb,ysql_enable_documentdb=true,enable_pg_cron=true"
# Start node 3
./bin/yugabyted start --advertise_address=127.0.0.3 \
--join=127.0.0.1 \
--base_dir=$HOME/yugabyte-data/node3 \
--cloud_location=aws.us-east-1.us-east-1c \
--master_flags="allowed_preview_flags_csv=ysql_enable_documentdb,ysql_enable_documentdb=true,enable_pg_cron=true" \
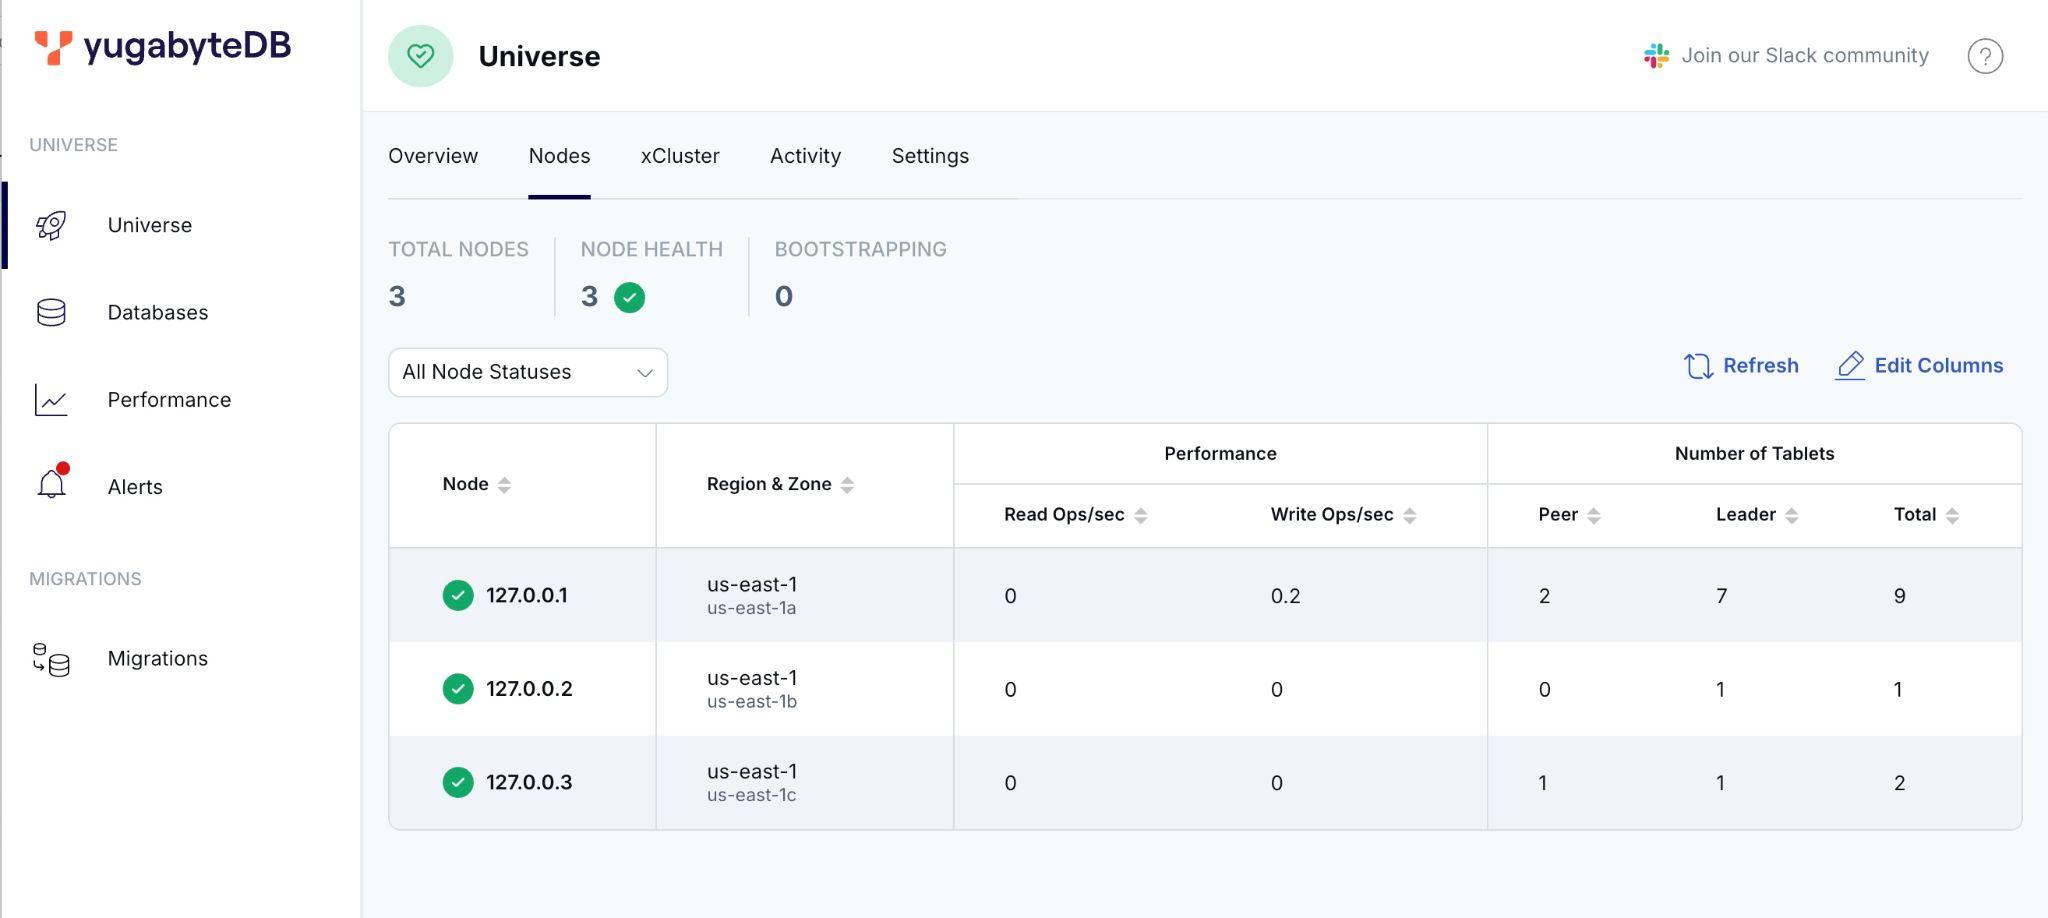
--tserver_flags="allowed_preview_flags_csv=ysql_enable_documentdb,ysql_enable_documentdb=true,enable_pg_cron=true"Check the cluster state and the tablet shards by navigating to http://127.0.0.11:15433/?tab=tabNodes
2. Start the FerretDB Gateway
Download and install FerretDB.
curl -L --output ferretdb-linux-amd64.rpm https://github.com/FerretDB/FerretDB/releases/download/v2.0.0-rc.5/ferretdb-linux-amd64.rpm

sudo rpm -i ferretdb-linux-amd64.rpm

ferretdb --version
Start three instances of FerretDB, one for each YugabyteDB node.
# Node 1
ferretdb --postgresql-url="postgres://yugabyte@127.0.0.1:5433/yugabyte" --no-auth --listen-addr 127.0.0.1:27017 --debug-addr="127.0.0.1:8088"

# Node 2
ferretdb --postgresql-url="postgres://yugabyte@127.0.0.2:5433/yugabyte" --no-auth --listen-addr 127.0.0.2:27017 --debug-addr="127.0.0.2:8088"

# Node 3
ferretdb --postgresql-url="postgres://yugabyte@127.0.0.3:5433/yugabyte" --no-auth --listen-addr 127.0.0.3:27017 --debug-addr="127.0.0.3:8088"
We now have three MongoDB endpoints, one for each node:
- 127.0.0.1:27017
- 127.0.0.2:27017
- 127.0.0.3:27017
3. Run MongoDB Workloads
You can now connect to these endpoints from any MongoDB client or the VSCode extension and run your MongoDB queries.
Here are some sample queries to help you get started:
// Insert one document into the 'speakers' Collection
db.getCollection('speakers').insertOne(
  {
  name: 'Person A',
  age: 34,
  sessions: ['BRK202'],
  email: 'A@yugabyte.com',
  social: ['https://linkedin.com/in/A',
            'https://x.com/A'],
  company: 'YugabyteDB',
  });

db.getCollection('speakers').insertOne(
  {
  name: 'Person B',
  age: 48,
  sessions: ['BRK202'],
  email: 'B@yugabyte.com',
  social: ['https://myspace.com/B'],
  company: 'YugabyteDB',
  })

// Insert an array of documents
db.getCollection('speakers').insertMany([
  {
  name: 'Person C',
  age: 30,
  sessions: ['BRK150','BRK202'],
  email: 'C@awesome.com',
  company: 'DistributedDB',
  },
  {
  name: 'Person D',
  age: 34,
  sessions: ['BRK101', 'BRK202', 'BRK206',],
  email: 'siddhesh@microsoft.com',
  company: 'DistributedDB',
  }
]);

// Validate the inserts
db.getCollection('speakers').countDocuments();

db.getCollection('speakers').find();

// Insert 200 random documents
random_speakers = []
for (let i = 0; i < 200; i++) {
    random_speakers.push({
        name: `Speaker${i + 1}`,
        age: Math.floor(Math.random() * 27) + 20, // Random age between 20 and 47
        sessions: [`BRK${Math.floor(Math.random() * 500) + 100}`], // Random sessions code
        email: `speaker${i + 1}@yugabyte.com`,
        social: [`https://linkedin.com/in/random${i + 1}`, `https://x.com/${i + 1}`],
        company: `YugabyteDB`,
    });
}
db.getCollection('speakers').insertMany(random_speakers);


// Validate the data
db.getCollection('speakers').countDocuments();

// Filter and count on age
db.getCollection('speakers').countDocuments({'age': {'$gte': 40}});

db.getCollection('speakers').countDocuments({'age': {'$lt': 40}});


// Match element within an array
// List name, age and sessions of speakers with a myspace profile, sorted by age DESC
db.getCollection('speakers')
    .find({'social': { $elemMatch: { $regex: "myspace", $options: "i" } }},
        {_id:0, name:1, age:1, sessions:1})
    .sort({'age': -1})


// Pipeline query: Find sessions related to BRK202
db.getCollection('speakers').aggregate([
    {
        $match: {
        sessions: { $elemMatch: {$eq: "BRK202"} }
        }
    },
    {
        $project: {
        _id: 0, sessions: 1
        }
    },
    {
        $unwind: "$sessions"
    },
    {
        $match: {
        sessions: { $not: { $eq: "BRK202" } }
        }
    },
    {
        $group: {
        _id: null,
        relatedSessions: { $addToSet: "$sessions" }
        }
    },
    {
        $project: {
        _id: 0, relatedSessions: 1
        }
    }
  ])
Conclusion
As a multi-model distributed database, YugabyteDB offers users the ability to harness the power of SQL and the flexibility of NoSQL. Powering both from a single product helps simplify operational complexity and reduce database sprawl.
YugabyteDB extends this capability by introducing a MongoDB-compatible API with the support of the DocumentDB PostgreSQL extension. This offers users an open source alternative for MongoDB workloads that need to scale horizontally.
The collaboration between YugabyteDB, Microsoft, and FerretDB (plus future contributors) allows us to build an open source solution that provides a portable, interoperable API for document data stores.
Join the YugabyteDB Community and DocumentDB Discord to be part of this exciting journey!
Read our recent press release for more information on the collaboration between Microsoft and YugabyteDB.
We are pleased to announce Beta support for MongoDB API in the latest release of YugabyteDB (v2.25.2). This new capability is powered by Microsoft’s DocumentDB extension and made possible by YugabyteDB’s enhanced PostgreSQL compatibility.
YugabyteDB’s inbuilt resilience and distributed capabilities now provide a truly open source solution for MongoDB workloads that need to scale. Click to learn more about the joint collaboration between Microsoft and YugabyteDB.
YugabyteDB has always been a multi-model distributed database providing support for both relational (YSQL – PostgreSQL-based) and Non-SQL (YCQL – Cassandra-based) APIs. The new MongoDB API capability builds on YugabyteDB’s multi-model API commitment by adding support for storing and operating on document-based data. The data is stored natively in the BSON format to efficiently handle binary JSON.
In this blog, we share a step-by-step guide to deploying and running MongoDB workloads on an open source solution created by YugabyteDB, Microsoft (DocumentDB), and FerretDB, that provides a portable, interoperable API for document data stores.
YugabyteDB + DocumentDB + FerretDB
Three core components combine to allow MongoDB apps to seamlessly work on YugabyteDB:
- DocumentDB: A PostgreSQL extension that adds native support for the BSON data type and MongoDB API in PostgreSQL.
- YugabyteDB: A PostgreSQL fork that natively supports the DocumentDB extension and provides it with distributed capabilities.
- FerretDB: A stateless gateway that converts the MongoDB Protocol used by MongoDB apps into a PostgreSQL protocol that YugabyteDB and DocumentDB operate with.
Considerations
As an open source project, we have decided to release the new API while it is still under active development to facilitate community collaboration and contribution. This means there are some limitations/considerations in the current release:
- This is for Beta use only (so expect to find bugs).
- Currently no support for arm64.
- Currently no support for secondary indexes.
These limitations and additional enhancements are in active development, and will be addressed in future releases.
How to Deploy and Run MongoDB on YugabyteDB
The following is a step-by-step guide to deploy and run MongoDB workloads on YugabyteDB:
1. Start a YugabyteDB Cluster
For the purpose of this blog, we are going to run a simulated, 3 node local cluster. Refer to Deploy YugabyteDB for additional deployment options.
First, download v2.25.2 from https://docs.yugabyte.com/preview/releases/ybdb-releases/v2.25/#v2.25.2.0
The gFlags ysql_enable_documentdb and enable_pg_cron need to be enabled for you to use the DocumentDB extension. Since the feature is in Beta, you need to add ysql_enable_documentdb to allowed_preview_flags_csv.
# Start node 1
./bin/yugabyted start --advertise_address=127.0.0.1 \
--base_dir=$HOME/yugabyte-data/node1 \
--cloud_location=aws.us-east-1.us-east-1a \
--master_flags="allowed_preview_flags_csv=ysql_enable_documentdb,ysql_enable_documentdb=true,enable_pg_cron=true" \
--tserver_flags="allowed_preview_flags_csv=ysql_enable_documentdb,ysql_enable_documentdb=true,enable_pg_cron=true"
# Start node 2
./bin/yugabyted start --advertise_address=127.0.0.2 \
--join=127.0.0.1 \
--base_dir=$HOME/yugabyte-data/node2 \
--cloud_location=aws.us-east-1.us-east-1b \
--master_flags="allowed_preview_flags_csv=ysql_enable_documentdb,ysql_enable_documentdb=true,enable_pg_cron=true" \
--tserver_flags="allowed_preview_flags_csv=ysql_enable_documentdb,ysql_enable_documentdb=true,enable_pg_cron=true"
# Start node 3
./bin/yugabyted start --advertise_address=127.0.0.3 \
--join=127.0.0.1 \
--base_dir=$HOME/yugabyte-data/node3 \
--cloud_location=aws.us-east-1.us-east-1c \
--master_flags="allowed_preview_flags_csv=ysql_enable_documentdb,ysql_enable_documentdb=true,enable_pg_cron=true" \
--tserver_flags="allowed_preview_flags_csv=ysql_enable_documentdb,ysql_enable_documentdb=true,enable_pg_cron=true"Check the cluster state and the tablet shards by navigating to http://127.0.0.11:15433/?tab=tabNodes
2. Start the FerretDB Gateway
Download and install FerretDB.
curl -L --output ferretdb-linux-amd64.rpm https://github.com/FerretDB/FerretDB/releases/download/v2.0.0-rc.5/ferretdb-linux-amd64.rpm sudo rpm -i ferretdb-linux-amd64.rpm ferretdb --version
Start three instances of FerretDB, one for each YugabyteDB node.
# Node 1 ferretdb --postgresql-url="postgres://yugabyte@127.0.0.1:5433/yugabyte" --no-auth --listen-addr 127.0.0.1:27017 --debug-addr="127.0.0.1:8088" # Node 2 ferretdb --postgresql-url="postgres://yugabyte@127.0.0.2:5433/yugabyte" --no-auth --listen-addr 127.0.0.2:27017 --debug-addr="127.0.0.2:8088" # Node 3 ferretdb --postgresql-url="postgres://yugabyte@127.0.0.3:5433/yugabyte" --no-auth --listen-addr 127.0.0.3:27017 --debug-addr="127.0.0.3:8088"
We now have three MongoDB endpoints, one for each node:
- 127.0.0.1:27017
- 127.0.0.2:27017
- 127.0.0.3:27017
3. Run MongoDB Workloads
You can now connect to these endpoints from any MongoDB client or the VSCode extension and run your MongoDB queries.
Here are some sample queries to help you get started:
// Insert one document into the 'speakers' Collection
db.getCollection('speakers').insertOne(
{
name: 'Person A',
age: 34,
sessions: ['BRK202'],
email: 'A@yugabyte.com',
social: ['https://linkedin.com/in/A',
'https://x.com/A'],
company: 'YugabyteDB',
});
db.getCollection('speakers').insertOne(
{
name: 'Person B',
age: 48,
sessions: ['BRK202'],
email: 'B@yugabyte.com',
social: ['https://myspace.com/B'],
company: 'YugabyteDB',
})
// Insert an array of documents
db.getCollection('speakers').insertMany([
{
name: 'Person C',
age: 30,
sessions: ['BRK150','BRK202'],
email: 'C@awesome.com',
company: 'DistributedDB',
},
{
name: 'Person D',
age: 34,
sessions: ['BRK101', 'BRK202', 'BRK206',],
email: 'siddhesh@microsoft.com',
company: 'DistributedDB',
}
]);
// Validate the inserts
db.getCollection('speakers').countDocuments();
db.getCollection('speakers').find();
// Insert 200 random documents
random_speakers = []
for (let i = 0; i < 200; i++) {
random_speakers.push({
name: `Speaker${i + 1}`,
age: Math.floor(Math.random() * 27) + 20, // Random age between 20 and 47
sessions: [`BRK${Math.floor(Math.random() * 500) + 100}`], // Random sessions code
email: `speaker${i + 1}@yugabyte.com`,
social: [`https://linkedin.com/in/random${i + 1}`, `https://x.com/${i + 1}`],
company: `YugabyteDB`,
});
}
db.getCollection('speakers').insertMany(random_speakers);
// Validate the data
db.getCollection('speakers').countDocuments();
// Filter and count on age
db.getCollection('speakers').countDocuments({'age': {'$gte': 40}});
db.getCollection('speakers').countDocuments({'age': {'$lt': 40}});
// Match element within an array
// List name, age and sessions of speakers with a myspace profile, sorted by age DESC
db.getCollection('speakers')
.find({'social': { $elemMatch: { $regex: "myspace", $options: "i" } }},
{_id:0, name:1, age:1, sessions:1})
.sort({'age': -1})
// Pipeline query: Find sessions related to BRK202
db.getCollection('speakers').aggregate([
{
$match: {
sessions: { $elemMatch: {$eq: "BRK202"} }
}
},
{
$project: {
_id: 0, sessions: 1
}
},
{
$unwind: "$sessions"
},
{
$match: {
sessions: { $not: { $eq: "BRK202" } }
}
},
{
$group: {
_id: null,
relatedSessions: { $addToSet: "$sessions" }
}
},
{
$project: {
_id: 0, relatedSessions: 1
}
}
])Conclusion
As a multi-model distributed database, YugabyteDB offers users the ability to harness the power of SQL and the flexibility of NoSQL. Powering both from a single product helps simplify operational complexity and reduce database sprawl.
YugabyteDB extends this capability by introducing a MongoDB-compatible API with the support of the DocumentDB PostgreSQL extension. This offers users an open source alternative for MongoDB workloads that need to scale horizontally.
The collaboration between YugabyteDB, Microsoft, and FerretDB (plus future contributors) allows us to build an open source solution that provides a portable, interoperable API for document data stores.
Join the YugabyteDB Community and DocumentDB Discord to be part of this exciting journey!
Read our recent press release for more information on the collaboration between Microsoft and YugabyteDB.


